

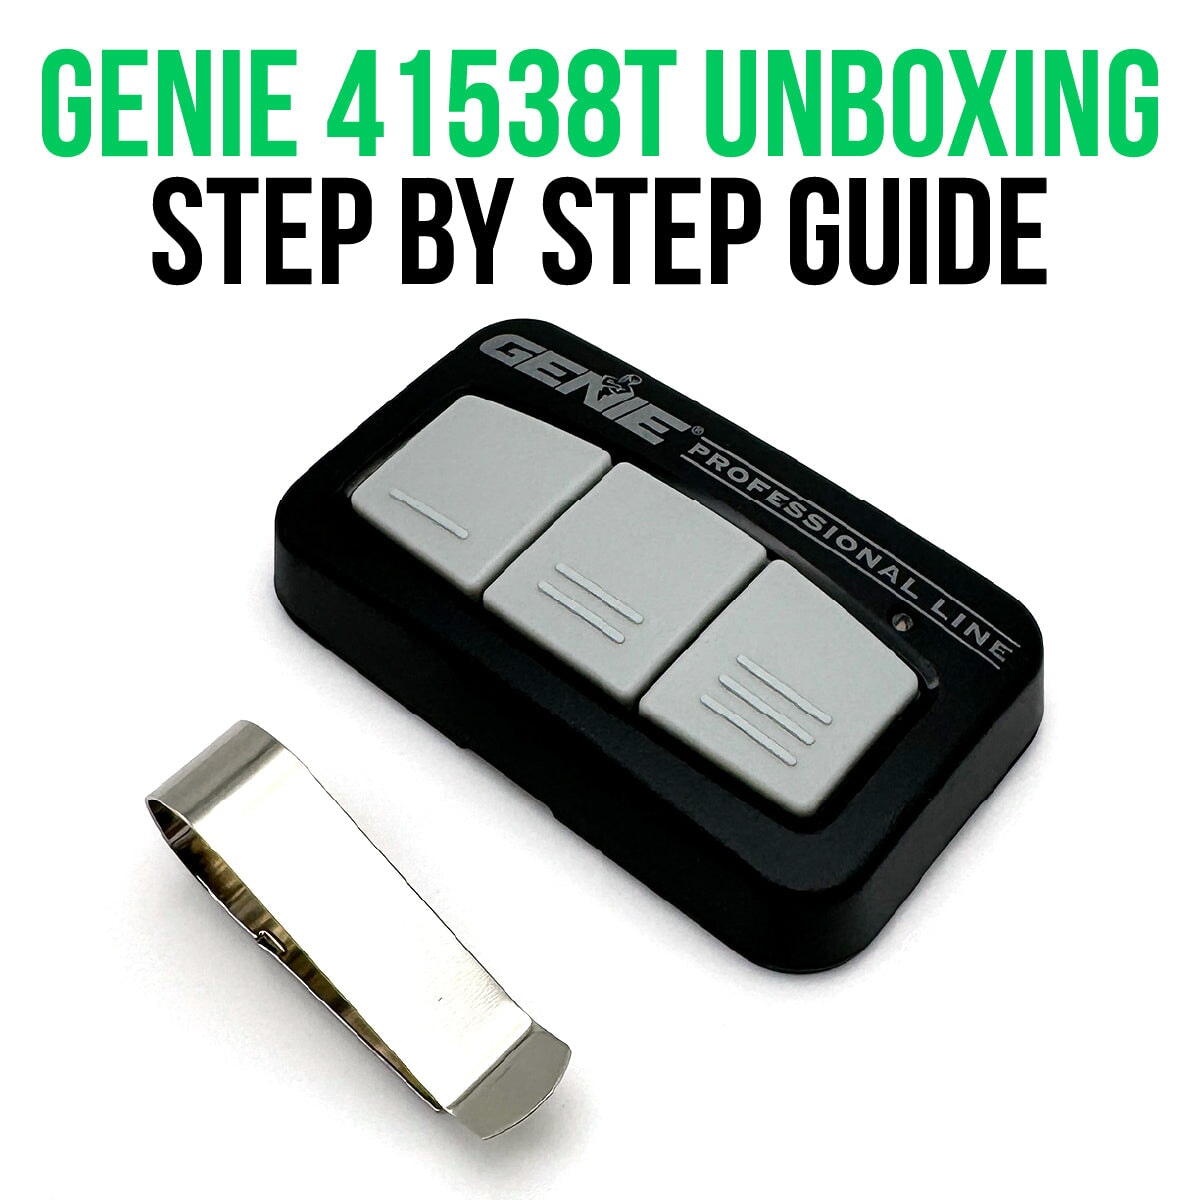

Unboxing and Setting Up Your Genie 3-Button Remote 41538T: A Step-by-Step Guide
Get your Genie 3-Button Garage Door Opener Remote 41538T up and running with this comprehensive setup guide. From unboxing to programming, we cover everything you need to know for a seamless experience.
Unboxing Your Genie 3-Button Remote | Compatibility Check | Installation Process | Programming the Remote | Troubleshooting Tips | Conclusion
Unboxing Your Genie 3-Button Remote
Start by carefully unboxing the Genie 41538T Remote. Inside, you should find the remote control, a battery, a visor clip for easy car attachment, and an instruction manual. Ensure all these items are present before proceeding.
Compatibility Check
Before installation, confirm the compatibility of the Genie 41538T with your garage door opener. This remote is designed to work with all Genie Intellicode® and Overhead Door Code Dodger® garage door openers manufactured since 1995.
Installation Process
Installation of the Genie 41538T Remote is straightforward. Begin by inserting the provided battery into the remote. Attach the visor clip to the remote if you plan to use it in your vehicle.
Programming the Remote
Programming your remote is a crucial step. Follow the instructions provided in the manual. Typically, this involves pressing the 'Learn' button on your garage door opener, then pressing the button on your remote you wish to program. The LED indicators on both the opener and the remote will guide you through successful pairing.
Troubleshooting Tips
If you encounter issues during programming, refer to these tips. Ensure the remote's battery is properly installed and working. If the remote is still unresponsive, repeat the programming steps, or refer to the manual for additional troubleshooting methods.
Conclusion
With your Genie 41538T Remote now set up, enjoy the convenience and flexibility it brings to controlling your garage doors. Follow this guide to ensure a hassle-free setup and get the most out of your new garage door remote.