
Springs


- Description
- Instructions
- Reviews
- FAQs
Description
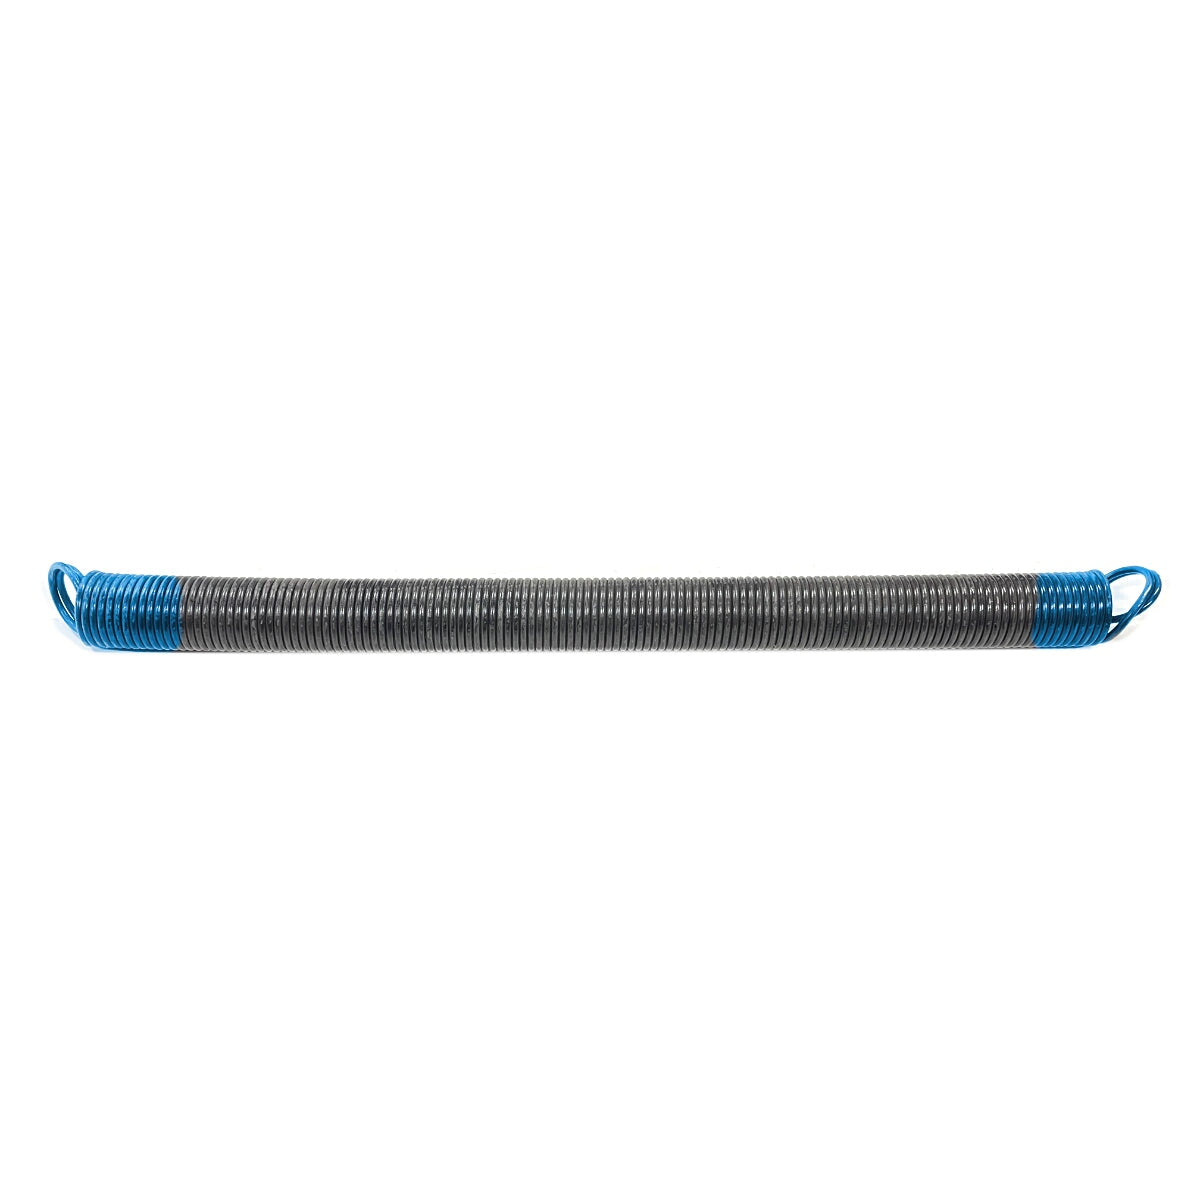
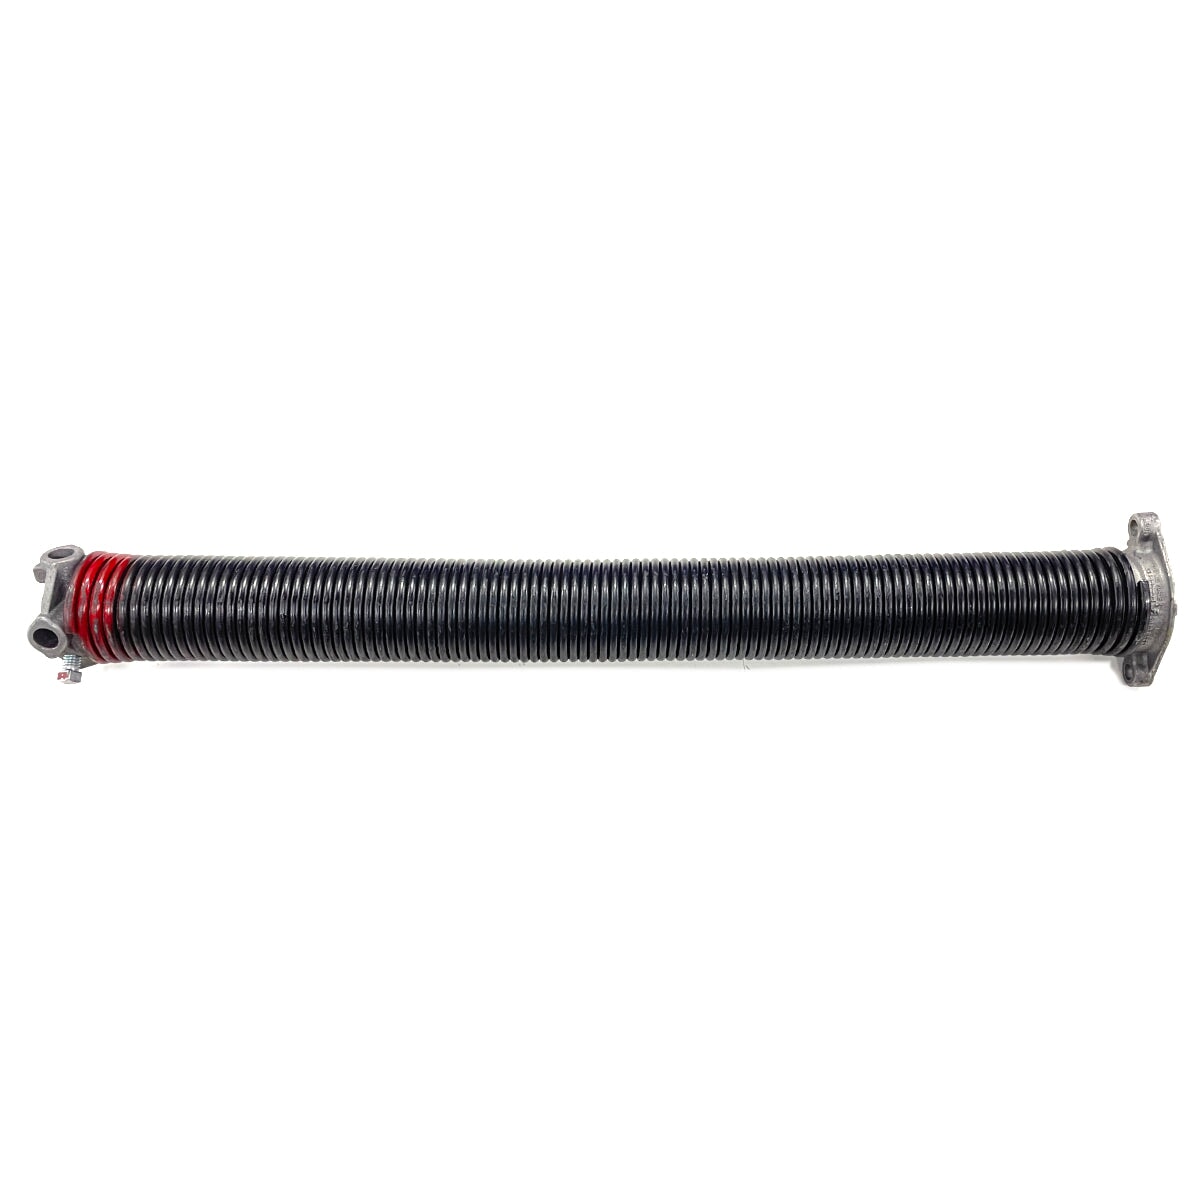
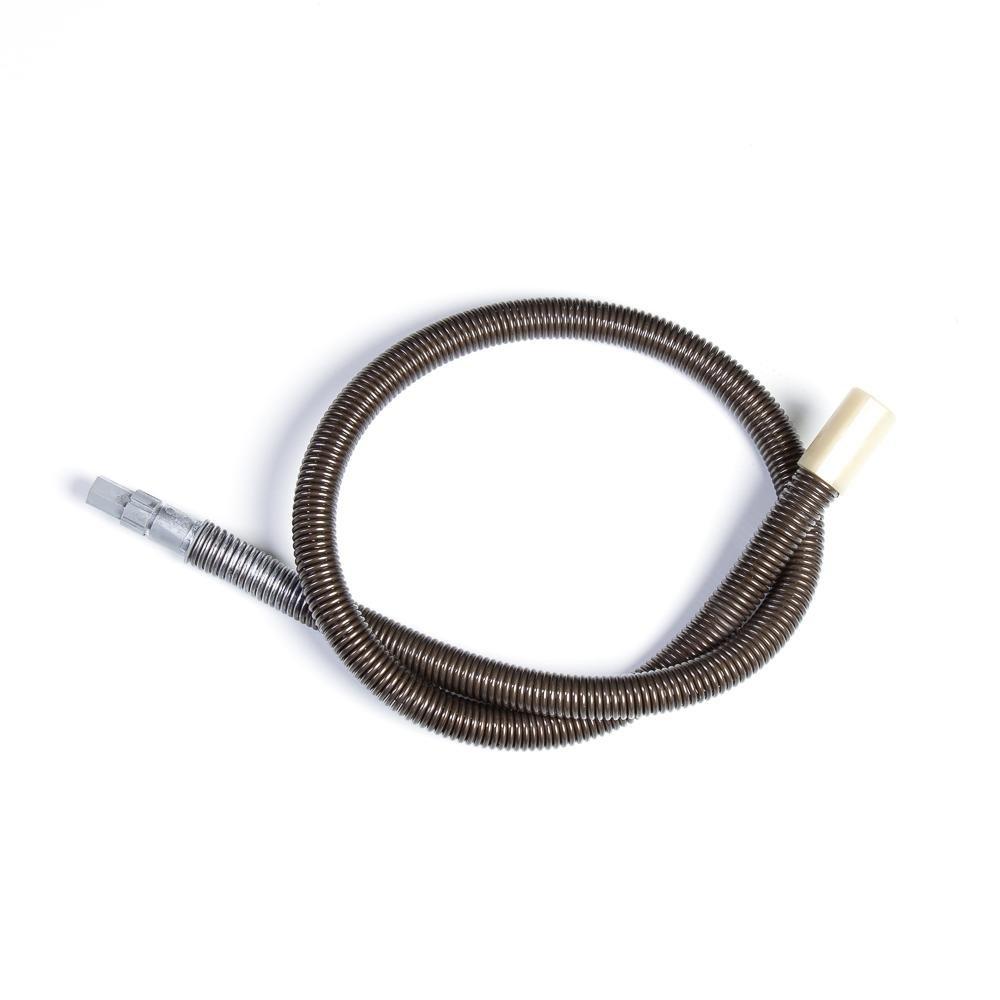
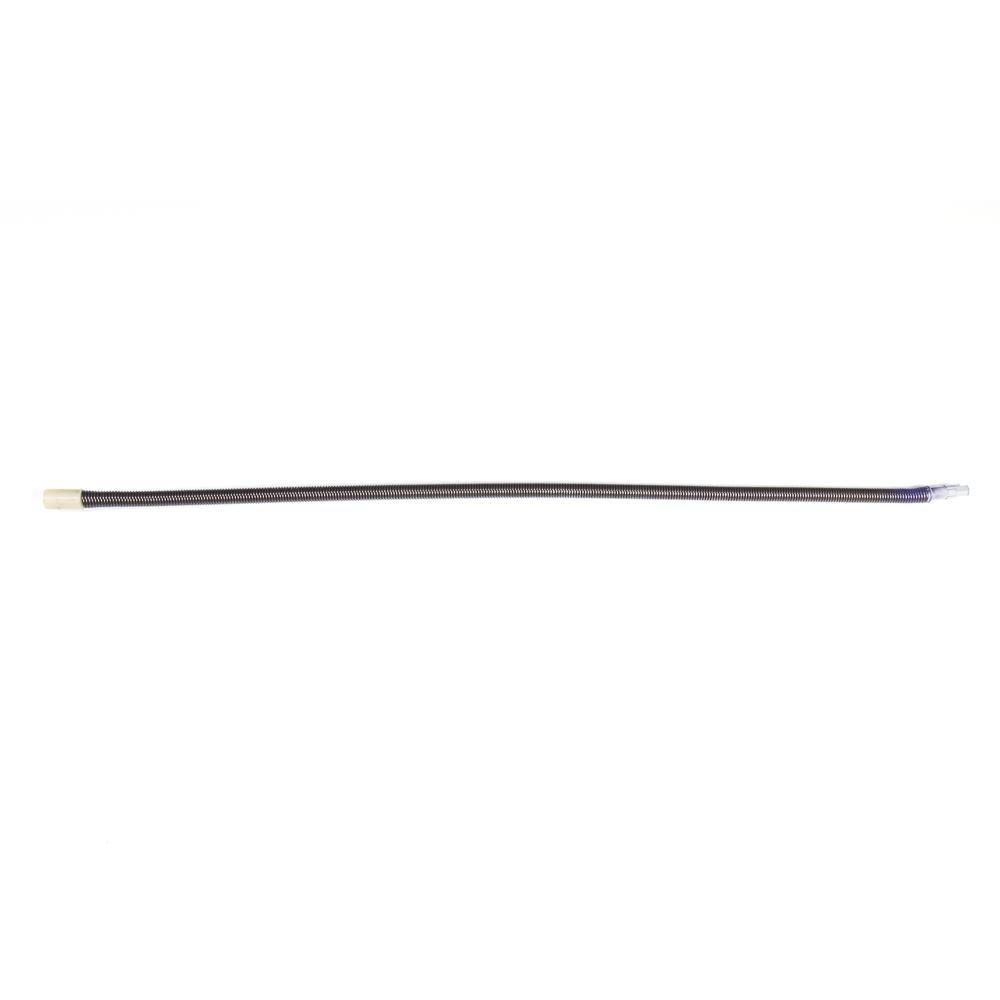
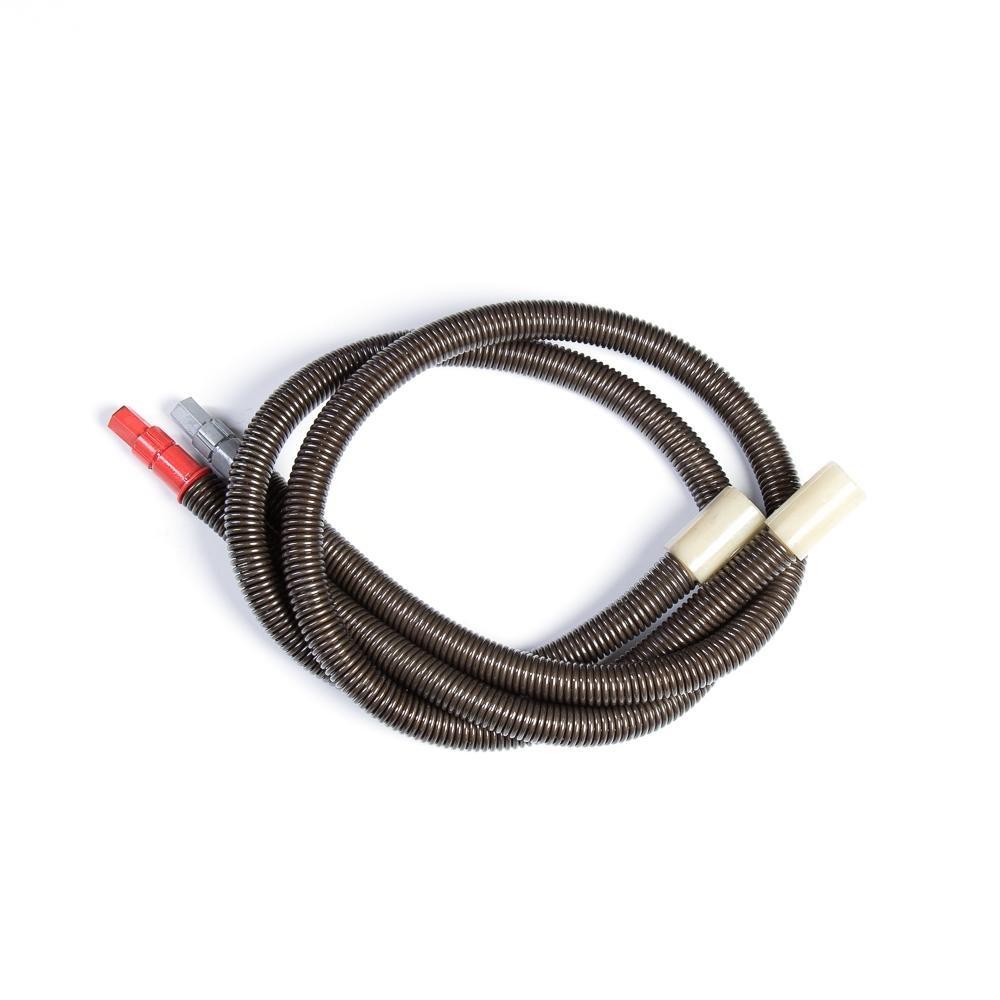
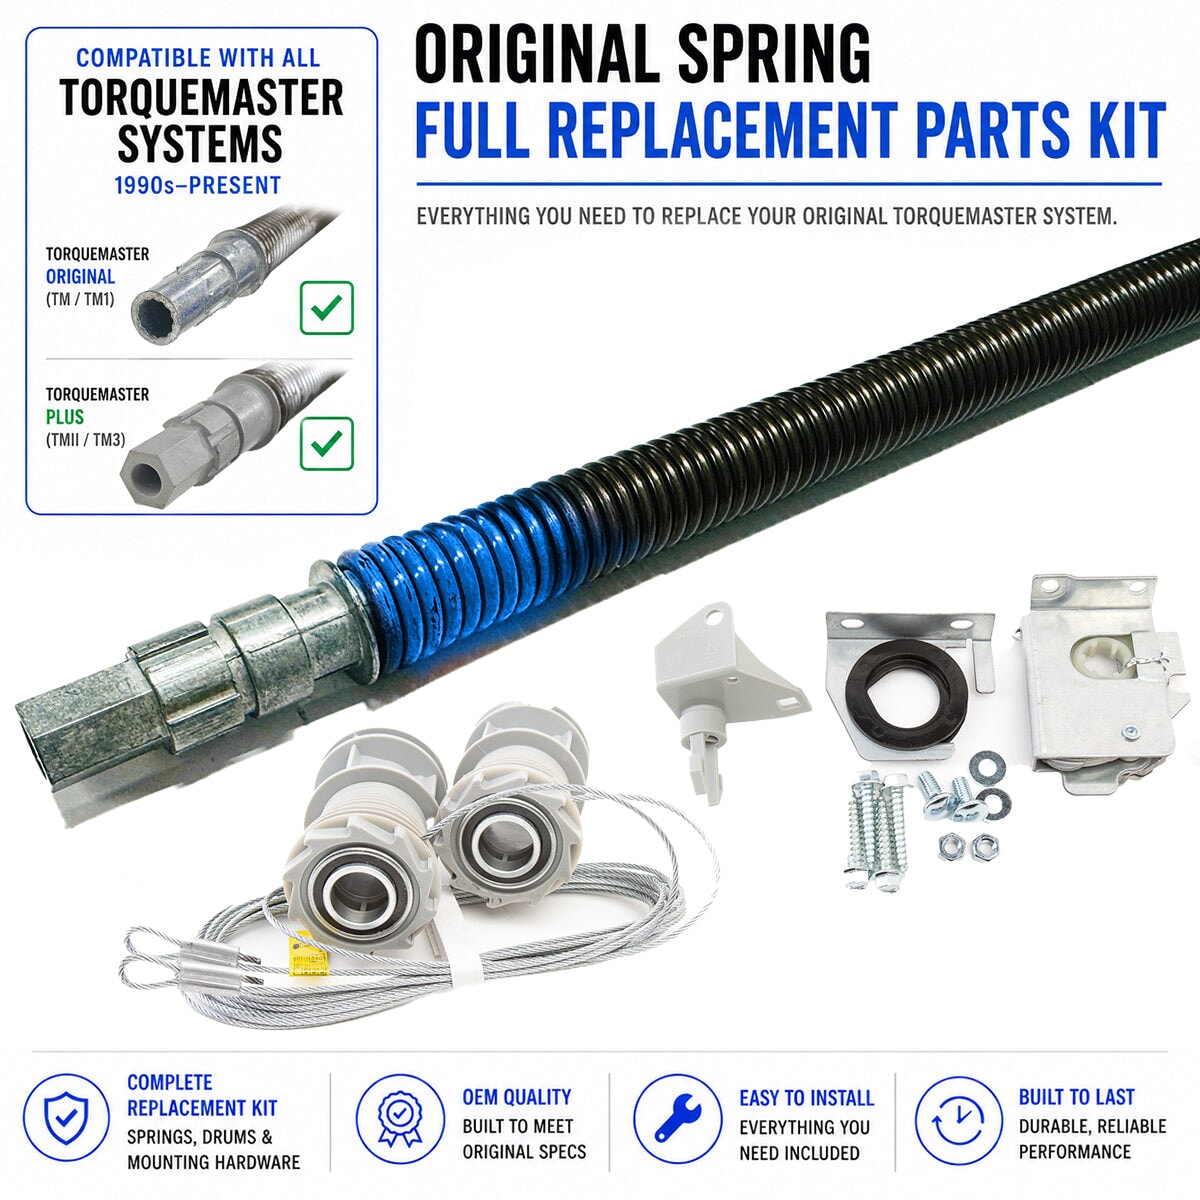
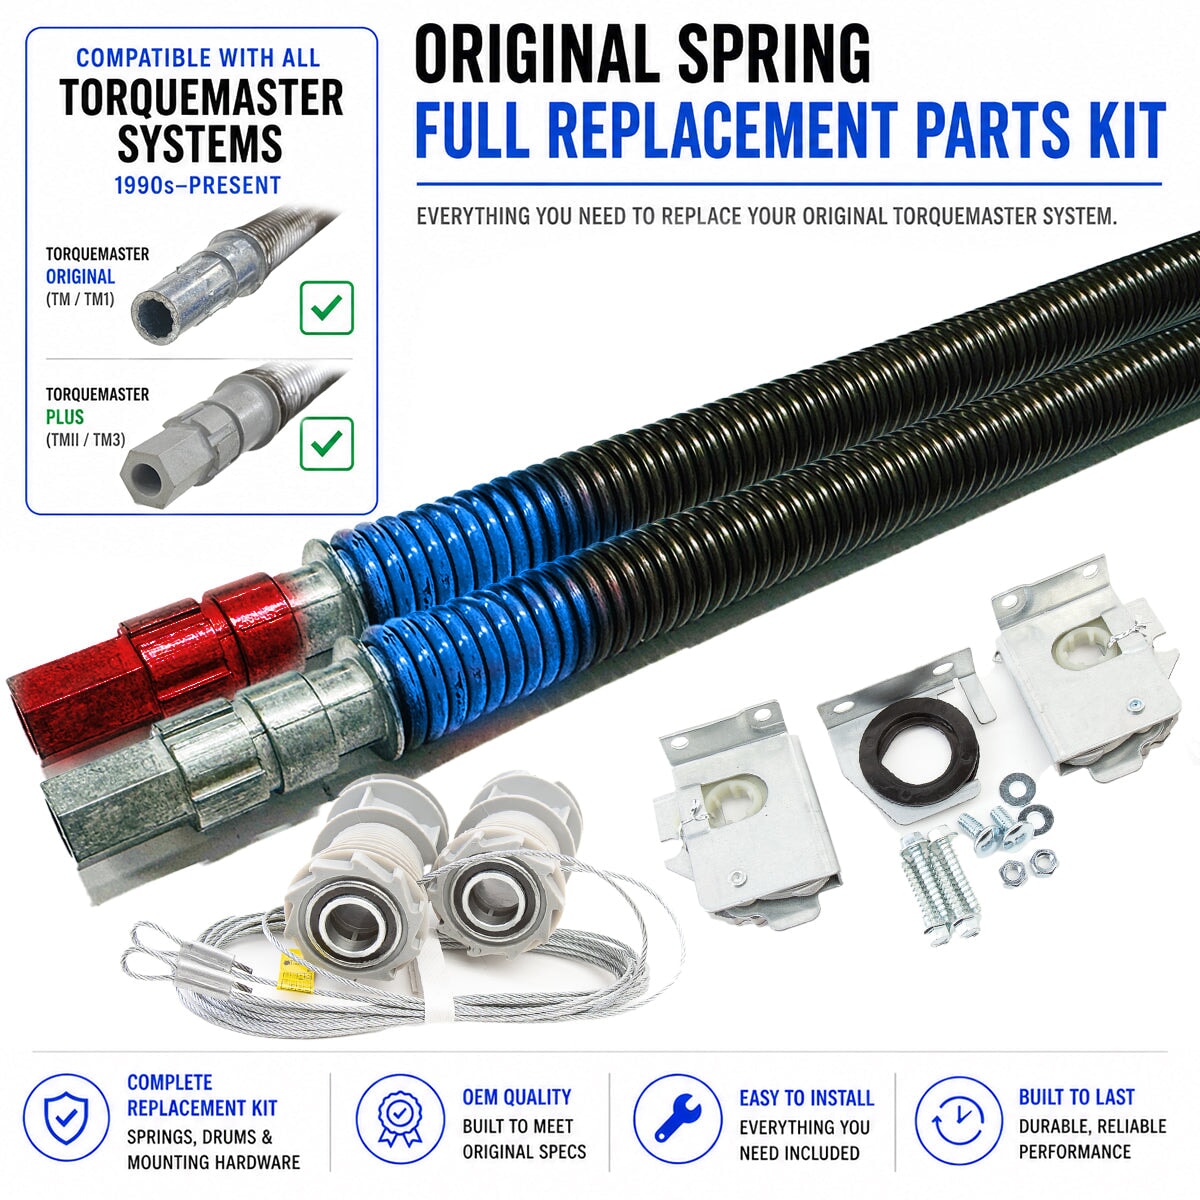
Heavy duty 10,000 high cycle life replacement springs for Wayne Dalton Garage Doors using the torquemaster spring system. This specialty spring is made only by Wayne Dalton for their Torquemaster TMS garage door system.
To order Torquemaster replacement springs, you need to know a few important details. First, you'll need the height and weight of your door. Additionally, you'll need to identify the style of your current torquemaster spring - whether it's the plus or original version.
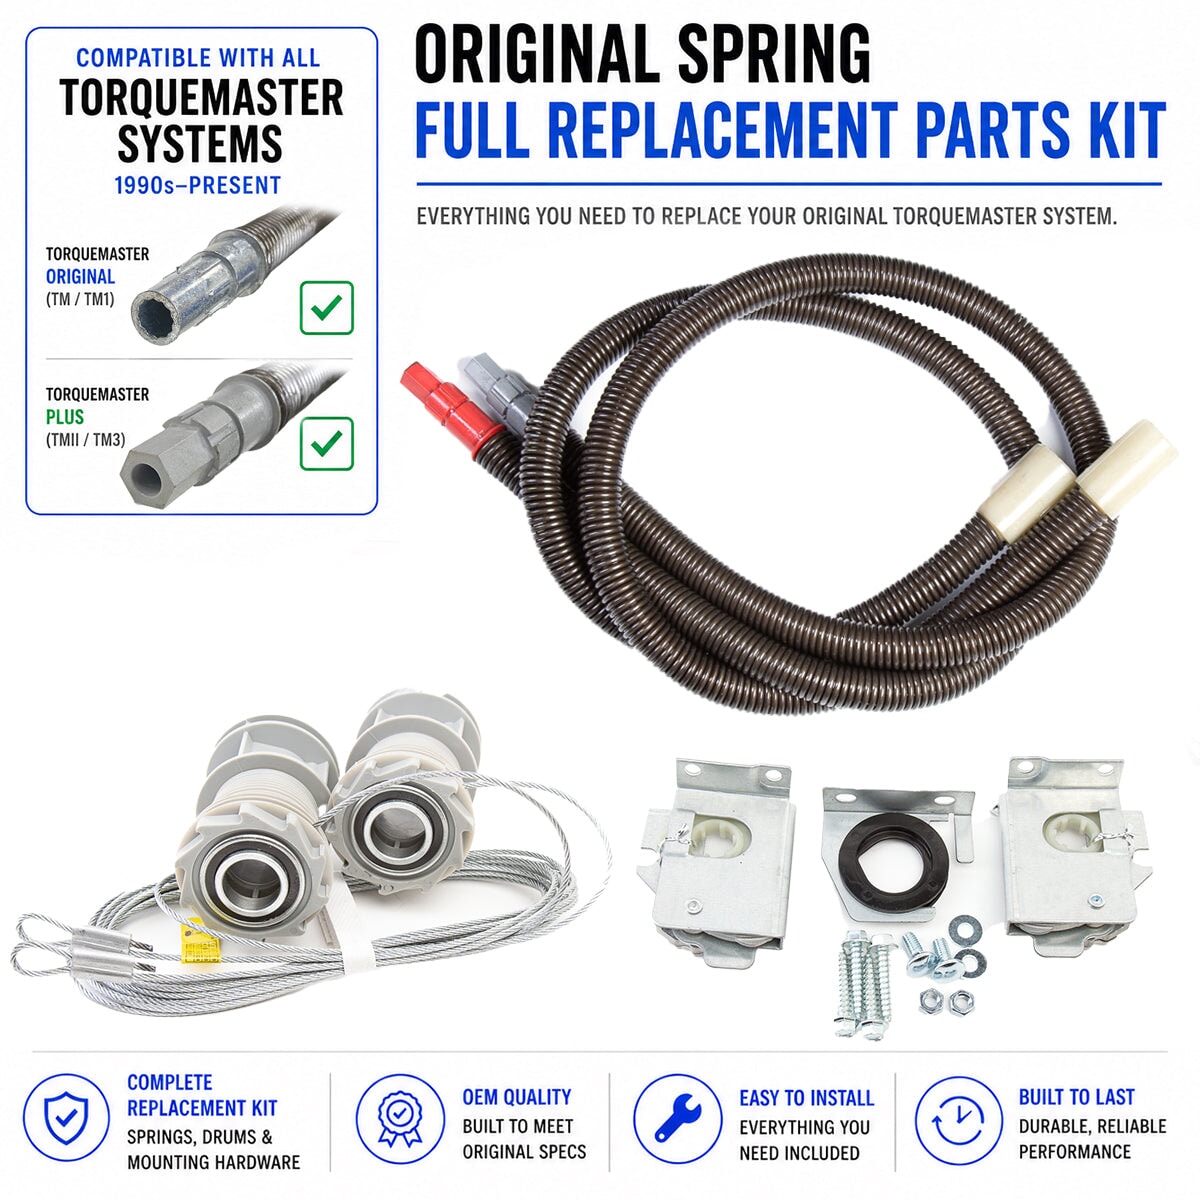
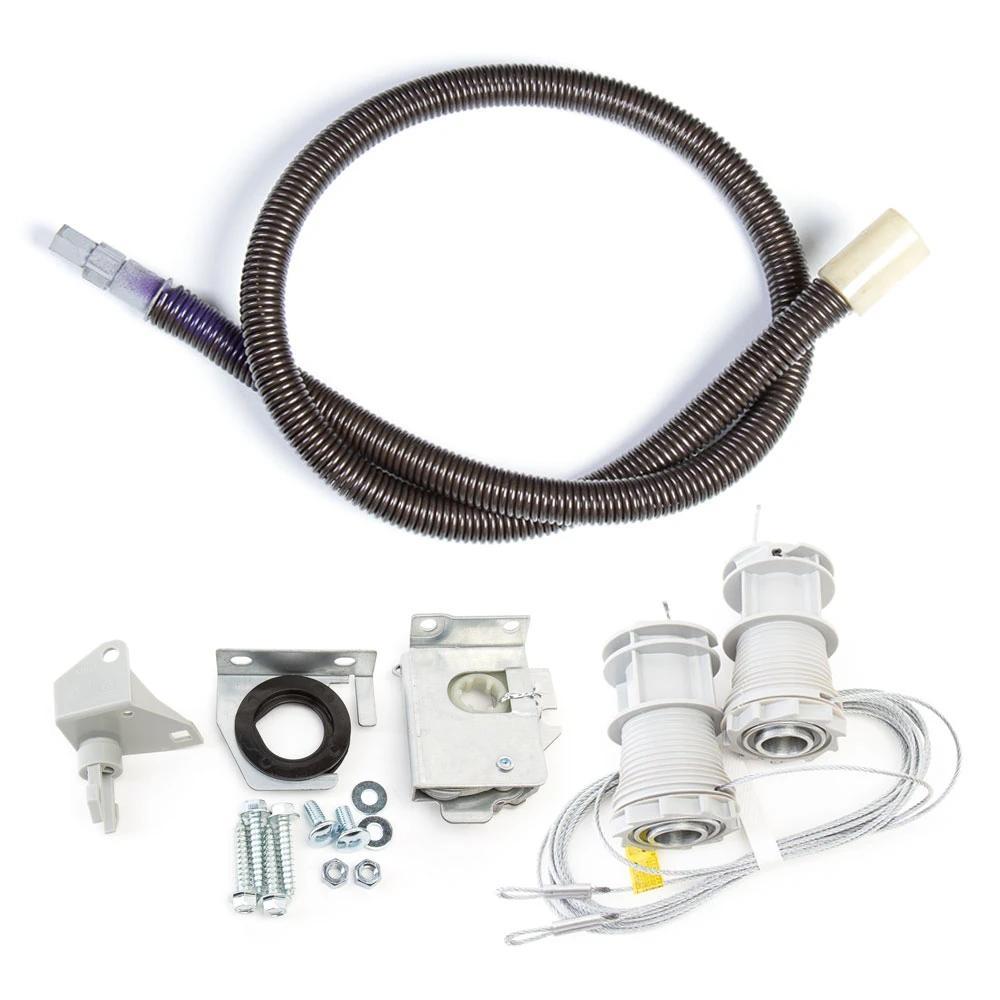
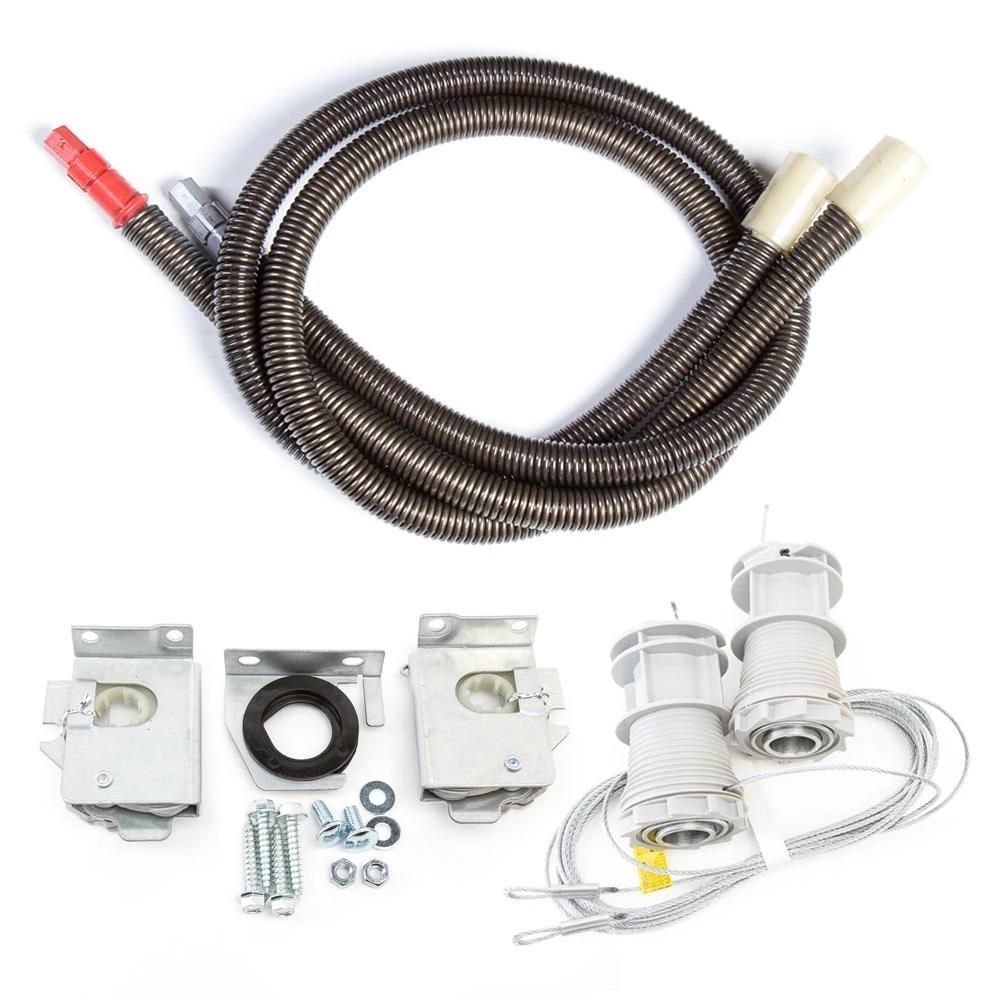
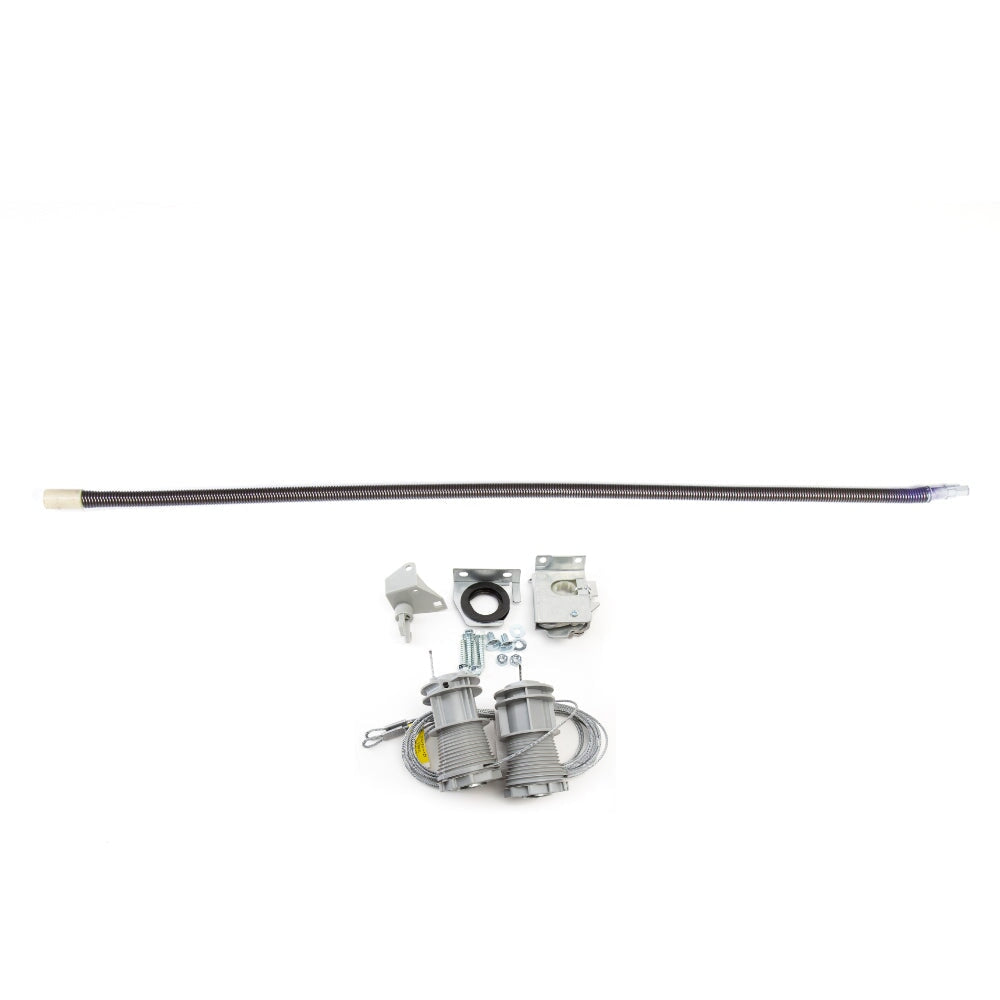
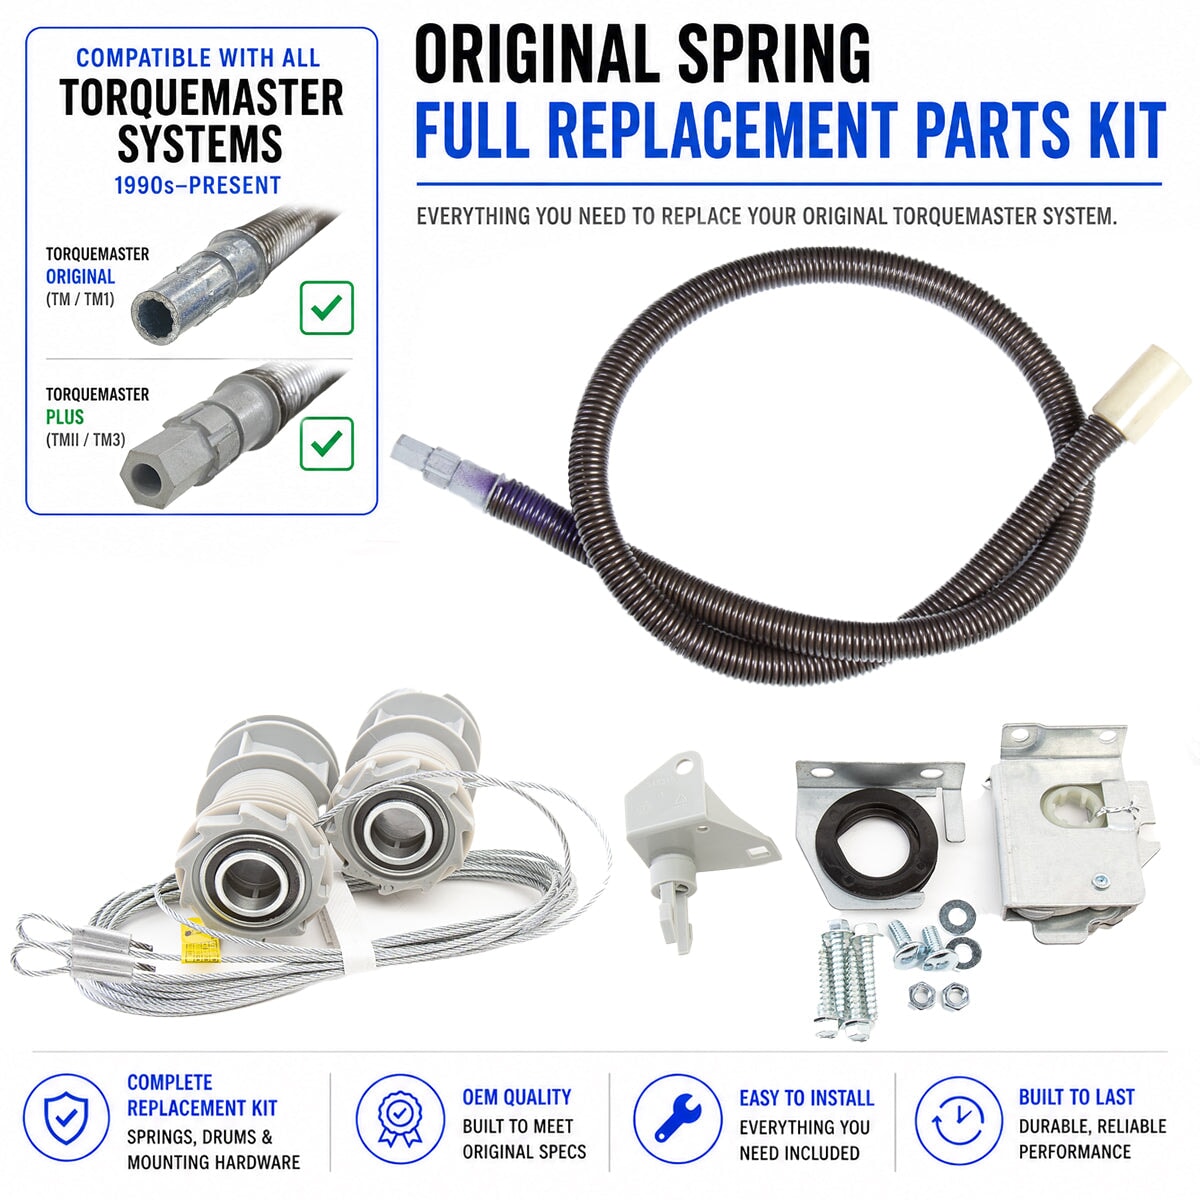
TorqueMaster Original style springs have been discontinued. If you have this type you will need to upgrade to the TorqueMaster Plus style. Simply select "Original (TM TMI) - Springs + Full Replacement Parts Kit". This will retrofit your existing Torquemaster system to be compatible with newer style springs.

If you aren't sure which kind of Torquemaster spring replacements to get, we recommend selecting the Complete Plus Upgrade with includes everything you could need in the latest Tourquemaster plus spring system. It comes with plus spring(s), winding assembly and cable drum kit for your door size. This is the worry free choice.
Here is a step by step guide for ordering springs. If this is overwhelming, just email us! We will help you order the correct replacements quickly. Click here for Torquemaster Spring FAQs
Plastic spring sleeves are not included. Cones may be made out of varying material (plastic or metal) as manufactured.
Ordering Info for Wayne Dalton TorqueMaster Torsion and TorqueMaster Plus Springs
When it comes to DIY garage door repair, Wayne Dalton's TorqueMaster torsion spring systems are specifically designed to be safer and more user-friendly for homeowners. Here's how to select the correct TorqueMaster spring for your garage door:
STEP 1: Selecting Spring Type - TorqueMaster Plus or TorqueMaster Original/One
Wayne Dalton TorqueMaster Original (TM One) Springs:
- Design: The original TorqueMaster One springs are wound using a drill. These springs feature a worm gear that drives the main drive gear. A counter wheel showcases the number of turns on the spring.
- Winding: These springs are wound using a drill combined with a 7/16” socket or nut driver. They're tailored for DIY home owners, simplifying installation, adjustment, and spring replacement.
Wayne Dalton TorqueMaster Plus Springs:
- Design: This newer system ditches the counter wheel. Instead, it uses a ratcheting mechanism. Installers need to mark the socket to count the number of turns while winding the springs.
- Winding: These springs require a 5/8" socket wrench for winding. With no dial for counting turns, the number of turns is gauged by marking the socket and counting as the spring is wound.
STEP 2: Determining Door Height
- It's important to accurately measure your door height
- For doors measuring between 6’6” to 7’5”, you'll consider them as 7ft doors.
- For doors ranging from 7’6” to 8’5”, they are categorized as 8ft doors.
STEP 3: Determining Door Weight
- The spring tube labels will sometimes list the weight or balance weight. However, if the label doesn't specify the weight, you can determine it by using a bathroom scale and releasing the spring tension.
Important: Check if You Have One or Two Springs (50–110 lb Doors)
Garage doors that weigh between 50 and 110 lbs can have either one spring or two springs. Look at the label on your spring tube to find out which setup you have:
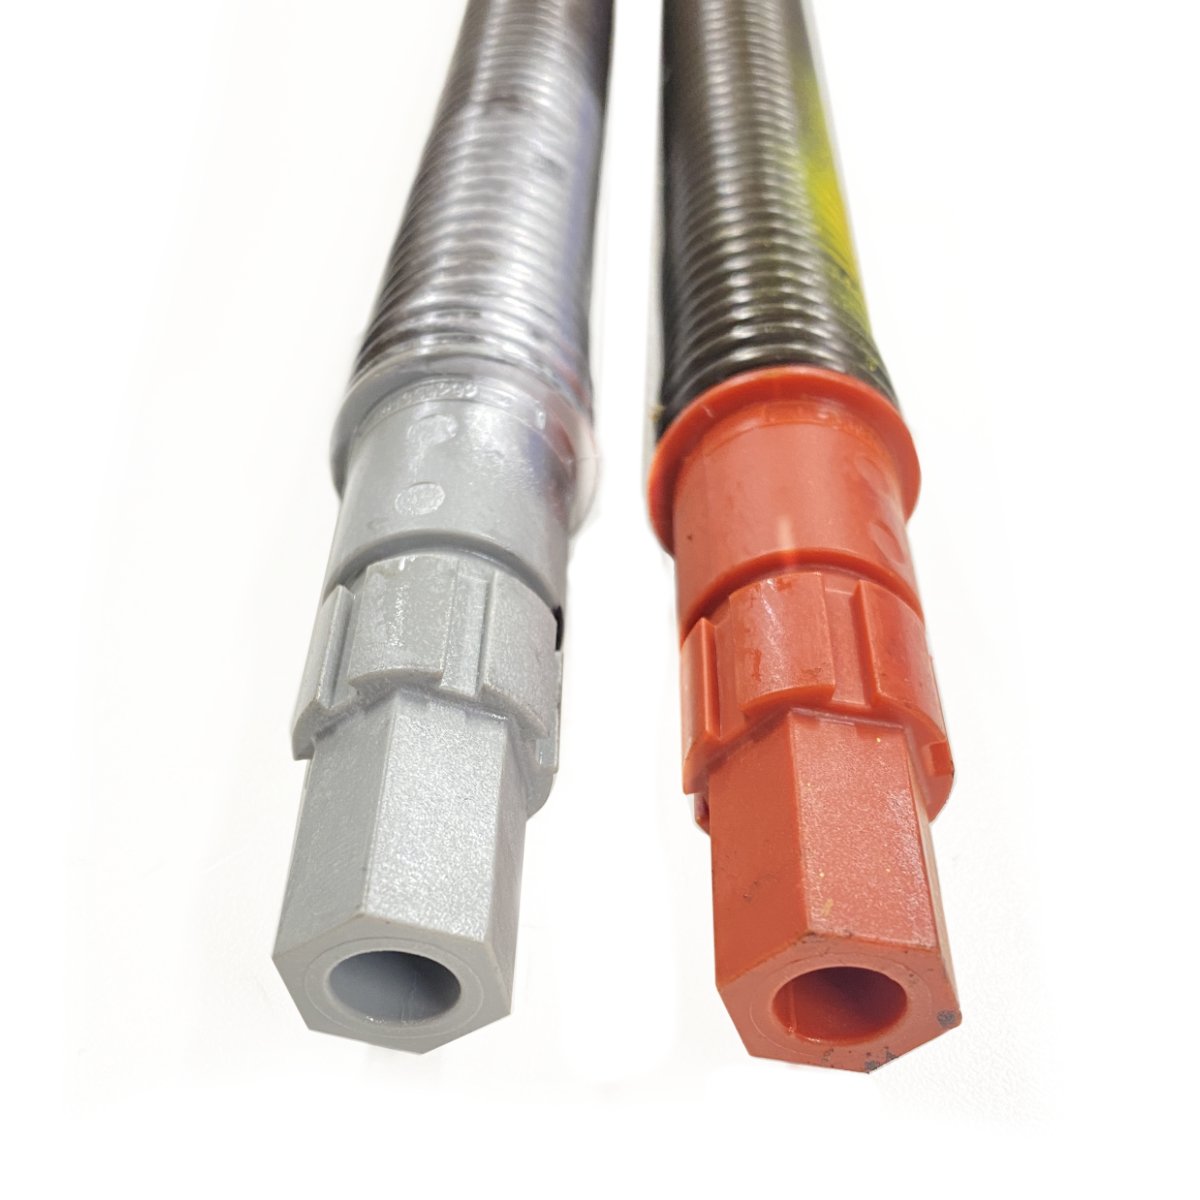
- If the label shows two spring sizes — one marked RH (right-hand) and one marked LH (left-hand) — your door has two springs.
- If the label shows only one spring size, your door has one spring.
- Quick visual check: Two-spring systems have winding cones and gears on both ends of the tube. One-spring systems have the winding gear and cone only on the right side. The left side will either have a plain cone sticking out with no gears or an idler bracket.
Wayne Dalton designed the TorqueMaster torsion spring system prioritizing safety, allowing DIY enthusiasts to install doors without the dangers inherent to standard torsion spring systems.
Order Using Door Model Number and Dimensions:
Another method to source the appropriate torquemaster torsion springs for your garage door involves using the door model number combined with its dimensions.
Step 1: Measure the Dimensions Begin by accurately measuring the height and width of your garage door.
Step 2: Identify the Model Number Once you have the dimensions, search for the door model number. This is often printed on a sticker located on the door sections, tracks, or tube. Common model numbers you might come across include 8000, 8100, 8200, 9100, 9600, Foamcore II (FC II), and the Thermowayne series numbers like 36, 37, or 38.
Step 3: Reach Out to Us With the door's dimensions and model number at hand, send us an email. We will promptly assist you in identifying the most suitable spring combination for your garage door.
The Advantages of Wayne Dalton TorqueMaster Springs for the DIY Homeowner
If you're a homeowner who is ready to save money and get the job done quickly, Wayne Dalton's TorqueMaster Springs might just be what you're looking for. Here's why:
-
User-Friendly Design:
Wayne Dalton created the TorqueMaster system with the average homeowner in mind. It's straightforward and doesn't require specialized tools or training. You can handle installations and adjustments using common household tools and our simple instructions. -
Cost-Effective:
DIY means you're cutting out the middleman - and the associated costs. By choosing to install or repair using the TorqueMaster system, you're saving hundreds on those often-pricey professional service fees. -
Prioritizing Safety:
Safety is paramount, especially when it comes to DIY projects. The TorqueMaster system is designed to be safer than many traditional torsion spring systems, giving you peace of mind while working. -
Practicality and Convenience:
Being able to manage your garage door's maintenance and repairs when you need it done invaluable. Sometimes lead times from local repair men can be weeks or months. The TorqueMaster system gives you the flexibility to address issues on your schedule, without waiting for appointments.
In short, Wayne Dalton's TorqueMaster Springs are a smart choice for homeowners. They offer a blend of convenience, cost savings, and safety, making them an excellent investment for your home.
Instructions
How to Order Torquemaster Springs
You only need to know a couple things to order replacements. You will need the height and weight of your door and then you have to determine which style (plus or original) torquemaster spring you have currently.
Watch this video on how to order the correct spring.
Installation Instructions:
Full Torquemaster Plus Installation Video
Product Manuals:
Torquemaster PLUS Spring Installation Instructions
Reviews
FAQs
Handpicked for you...


How to Upgrade Your TorqueMaster Original Springs (They're Discontinued - Upgrade to New Plus Version)
TorqueMaster Original (TM/TM1) springs have been discontinued. Discover why upgrading to the newer TorqueMaster Plus version is your best move - plus how to measure your door and exactly and what info to send us for the perfect replacement springs.
Read more
about How to Upgrade Your TorqueMaster Original Springs (They're Discontinued - Upgrade to New Plus Version)


How to Install a Garage Door Quieting Kit: Complete Guide
We've found that replacing the majority of the hinges and installing the rest of the kit does a pretty good job of silencing the door without needing to deal with that bottom roller. If you really feel it needs to be changed, we have a separate process for that, but it's not necessary for most installations.
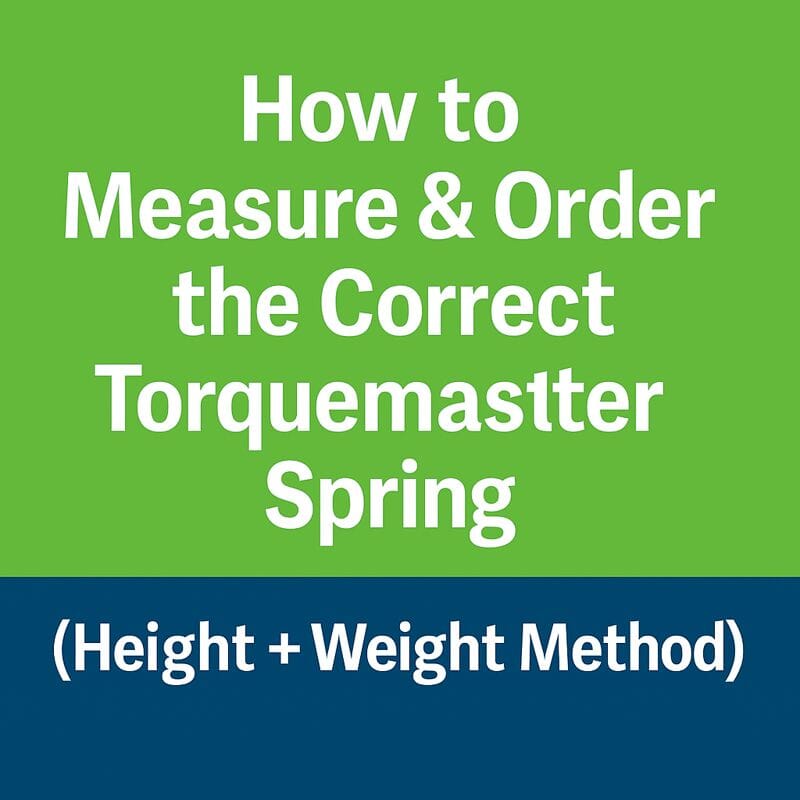

How to Order the Correct Torquemaster Spring | Height & Weight Method
Stop guessing your TorqueMaster spring. If the sticker is gone or unreadable, measuring your door height and weight is the only reliable way to get the right replacement the first time.
Read more
about How to Order the Correct Torquemaster Spring | Height & Weight Method
- Description
- Instructions
- Reviews
- FAQs
Description
Heavy duty 10,000 high cycle life replacement springs for Wayne Dalton Garage Doors using the torquemaster spring system. This specialty spring is made only by Wayne Dalton for their Torquemaster TMS garage door system.
To order Torquemaster replacement springs, you need to know a few important details. First, you'll need the height and weight of your door. Additionally, you'll need to identify the style of your current torquemaster spring - whether it's the plus or original version.
TorqueMaster Original style springs have been discontinued. If you have this type you will need to upgrade to the TorqueMaster Plus style. Simply select "Original (TM TMI) - Springs + Full Replacement Parts Kit". This will retrofit your existing Torquemaster system to be compatible with newer style springs.
If you aren't sure which kind of Torquemaster spring replacements to get, we recommend selecting the Complete Plus Upgrade with includes everything you could need in the latest Tourquemaster plus spring system. It comes with plus spring(s), winding assembly and cable drum kit for your door size. This is the worry free choice.
Here is a step by step guide for ordering springs. If this is overwhelming, just email us! We will help you order the correct replacements quickly. Click here for Torquemaster Spring FAQs
Plastic spring sleeves are not included. Cones may be made out of varying material (plastic or metal) as manufactured.
Ordering Info for Wayne Dalton TorqueMaster Torsion and TorqueMaster Plus Springs
When it comes to DIY garage door repair, Wayne Dalton's TorqueMaster torsion spring systems are specifically designed to be safer and more user-friendly for homeowners. Here's how to select the correct TorqueMaster spring for your garage door:
STEP 1: Selecting Spring Type - TorqueMaster Plus or TorqueMaster Original/One
Wayne Dalton TorqueMaster Original (TM One) Springs:
- Design: The original TorqueMaster One springs are wound using a drill. These springs feature a worm gear that drives the main drive gear. A counter wheel showcases the number of turns on the spring.
- Winding: These springs are wound using a drill combined with a 7/16” socket or nut driver. They're tailored for DIY home owners, simplifying installation, adjustment, and spring replacement.
Wayne Dalton TorqueMaster Plus Springs:
- Design: This newer system ditches the counter wheel. Instead, it uses a ratcheting mechanism. Installers need to mark the socket to count the number of turns while winding the springs.
- Winding: These springs require a 5/8" socket wrench for winding. With no dial for counting turns, the number of turns is gauged by marking the socket and counting as the spring is wound.
STEP 2: Determining Door Height
- It's important to accurately measure your door height
- For doors measuring between 6’6” to 7’5”, you'll consider them as 7ft doors.
- For doors ranging from 7’6” to 8’5”, they are categorized as 8ft doors.
STEP 3: Determining Door Weight
- The spring tube labels will sometimes list the weight or balance weight. However, if the label doesn't specify the weight, you can determine it by using a bathroom scale and releasing the spring tension.
Important: Check if You Have One or Two Springs (50–110 lb Doors)
Garage doors that weigh between 50 and 110 lbs can have either one spring or two springs. Look at the label on your spring tube to find out which setup you have:
- If the label shows two spring sizes — one marked RH (right-hand) and one marked LH (left-hand) — your door has two springs.
- If the label shows only one spring size, your door has one spring.
- Quick visual check: Two-spring systems have winding cones and gears on both ends of the tube. One-spring systems have the winding gear and cone only on the right side. The left side will either have a plain cone sticking out with no gears or an idler bracket.
Wayne Dalton designed the TorqueMaster torsion spring system prioritizing safety, allowing DIY enthusiasts to install doors without the dangers inherent to standard torsion spring systems.
Order Using Door Model Number and Dimensions:
Another method to source the appropriate torquemaster torsion springs for your garage door involves using the door model number combined with its dimensions.
Step 1: Measure the Dimensions Begin by accurately measuring the height and width of your garage door.
Step 2: Identify the Model Number Once you have the dimensions, search for the door model number. This is often printed on a sticker located on the door sections, tracks, or tube. Common model numbers you might come across include 8000, 8100, 8200, 9100, 9600, Foamcore II (FC II), and the Thermowayne series numbers like 36, 37, or 38.
Step 3: Reach Out to Us With the door's dimensions and model number at hand, send us an email. We will promptly assist you in identifying the most suitable spring combination for your garage door.
The Advantages of Wayne Dalton TorqueMaster Springs for the DIY Homeowner
If you're a homeowner who is ready to save money and get the job done quickly, Wayne Dalton's TorqueMaster Springs might just be what you're looking for. Here's why:
-
User-Friendly Design:
Wayne Dalton created the TorqueMaster system with the average homeowner in mind. It's straightforward and doesn't require specialized tools or training. You can handle installations and adjustments using common household tools and our simple instructions. -
Cost-Effective:
DIY means you're cutting out the middleman - and the associated costs. By choosing to install or repair using the TorqueMaster system, you're saving hundreds on those often-pricey professional service fees. -
Prioritizing Safety:
Safety is paramount, especially when it comes to DIY projects. The TorqueMaster system is designed to be safer than many traditional torsion spring systems, giving you peace of mind while working. -
Practicality and Convenience:
Being able to manage your garage door's maintenance and repairs when you need it done invaluable. Sometimes lead times from local repair men can be weeks or months. The TorqueMaster system gives you the flexibility to address issues on your schedule, without waiting for appointments.
In short, Wayne Dalton's TorqueMaster Springs are a smart choice for homeowners. They offer a blend of convenience, cost savings, and safety, making them an excellent investment for your home.
Instructions
How to Order Torquemaster Springs
You only need to know a couple things to order replacements. You will need the height and weight of your door and then you have to determine which style (plus or original) torquemaster spring you have currently.
Watch this video on how to order the correct spring.
Installation Instructions:
Full Torquemaster Plus Installation Video
Product Manuals:
Torquemaster PLUS Spring Installation Instructions
Reviews
FAQs