
Springs


How to Order the Right TorqueMaster Spring by Wire Size (No Measuring Needed)

If you’re replacing a TorqueMaster spring, don’t worry — this process is way easier than most people think. You don’t need to measure anything. You don’t need special tools. You just need a few numbers off the spring tube label, and we’ll match you with the exact replacement spring.
Here’s how it works, step-by-step.
Step 1: Identify Which TorqueMaster System You Have:
First, take a look at the end of your spring tube, where it connects to the bracket on the side of the door. You're looking for one of two setups:
Option 1 — TorqueMaster Plus (TM3 or TMP):
If you can see a winding cone sticking out the end of the bracket, that means you’ve got a TorqueMaster Plus system. The spring label on the tube should say TM3 or TMP.

Option 2 — Original TorqueMaster (TM):
If the end has a visible counter gear instead, that’s the original TorqueMaster system. The label will just say TM.

This is the first thing you’ll select in the tool - the spring type.
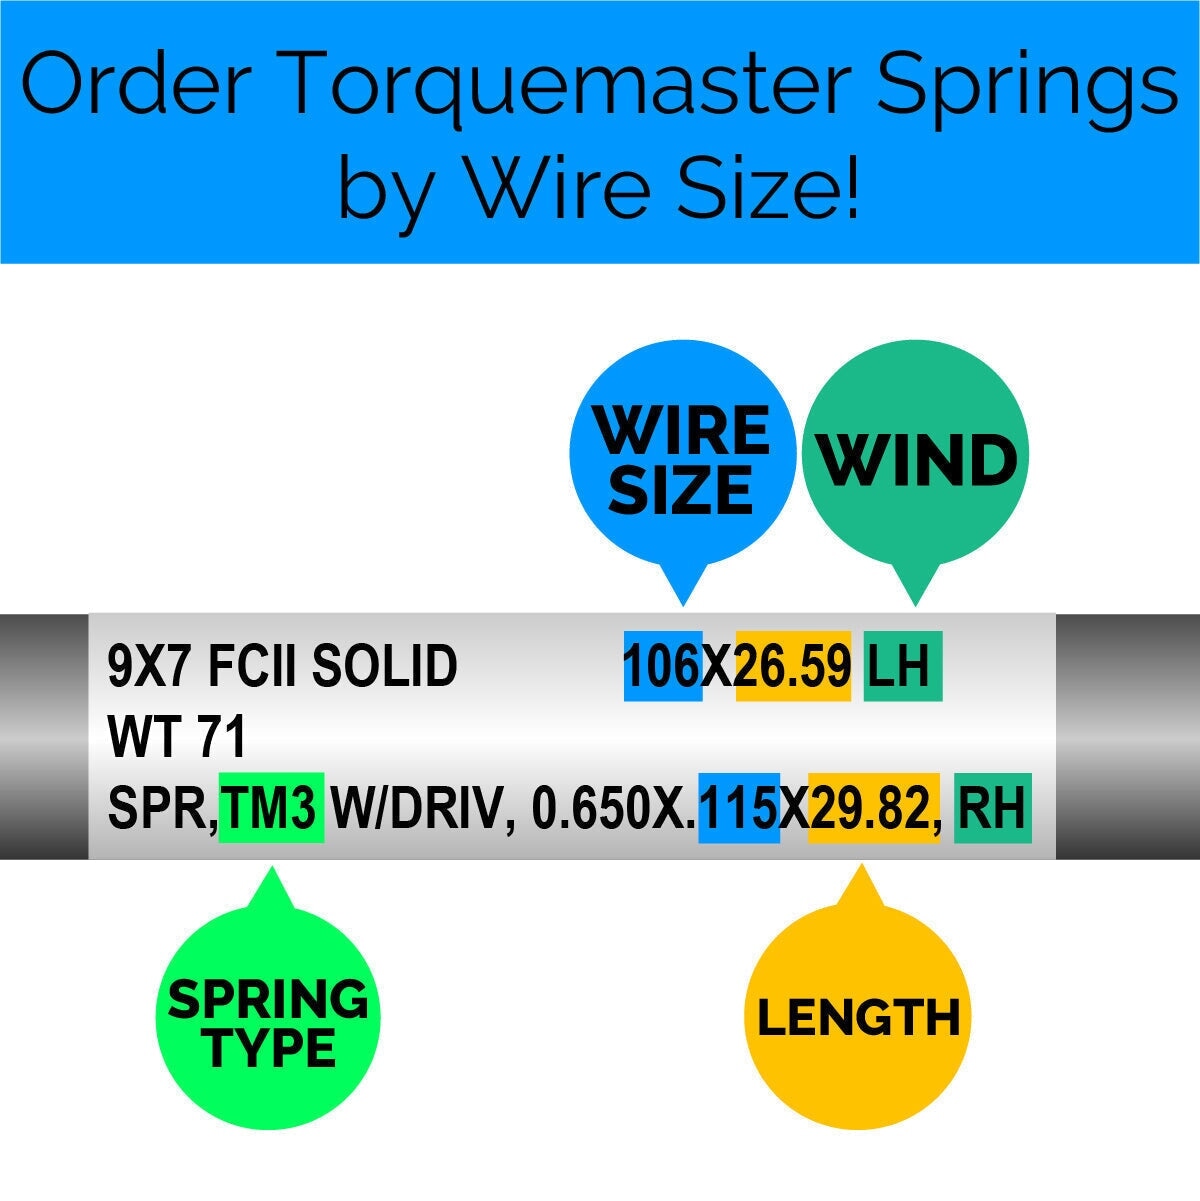
Step 2: Read the Label for Wire Size and Length:
Next, find the white label on your spring tube. You’re looking for a string of numbers that looks something like this:
0.650 x .115 x 29.82
Here’s how to read that:
- .115 is the wire size
- 29.82 is the spring length (in inches)
These are the exact numbers you’ll need to plug into the selector. Don’t try to measure anything - just copy what the label says.

Step 3: Find the Wind Direction
Now look at the same label again, and you’ll see RH or LH next to each spring.
RH means right-hand wind
LH means left-hand wind
You’ll need to enter this into the selector to make sure you get the correct spring. If you’re replacing both springs, make sure you check each one separately — they’re often different.

Now You’re Ready to Order Once you have:
- The spring type (TM, TM3, or TMP)
- The wire size and length
- The wind direction
Just enter those into the "Order by Wire Size" tool, and we’ll take care of the rest.

No measuring. No guesswork. Just the right part — the first time.
Need help? Send us a clear photo of your spring label and we’ll walk you through it. Simple as that.
Also in Garage Door Parts - DIY Handbook


How to Upgrade Your TorqueMaster Original Springs (They're Discontinued - Upgrade to New Plus Version)
TorqueMaster Original (TM/TM1) springs have been discontinued. Discover why upgrading to the newer TorqueMaster Plus version is your best move - plus how to measure your door and exactly and what info to send us for the perfect replacement springs.
Read more
about How to Order the Right TorqueMaster Spring by Wire Size (No Measuring Needed)


How to Install a Garage Door Quieting Kit: Complete Guide
We've found that replacing the majority of the hinges and installing the rest of the kit does a pretty good job of silencing the door without needing to deal with that bottom roller. If you really feel it needs to be changed, we have a separate process for that, but it's not necessary for most installations.
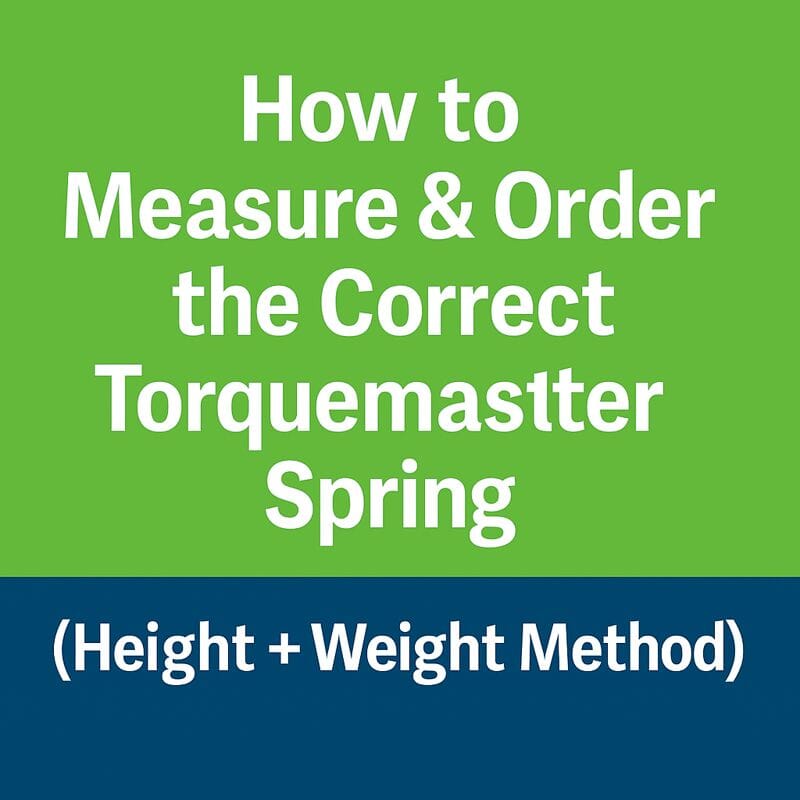

How to Order the Correct Torquemaster Spring | Height & Weight Method
Stop guessing your TorqueMaster spring. If the sticker is gone or unreadable, measuring your door height and weight is the only reliable way to get the right replacement the first time.
Read more
about How to Order the Right TorqueMaster Spring by Wire Size (No Measuring Needed)