
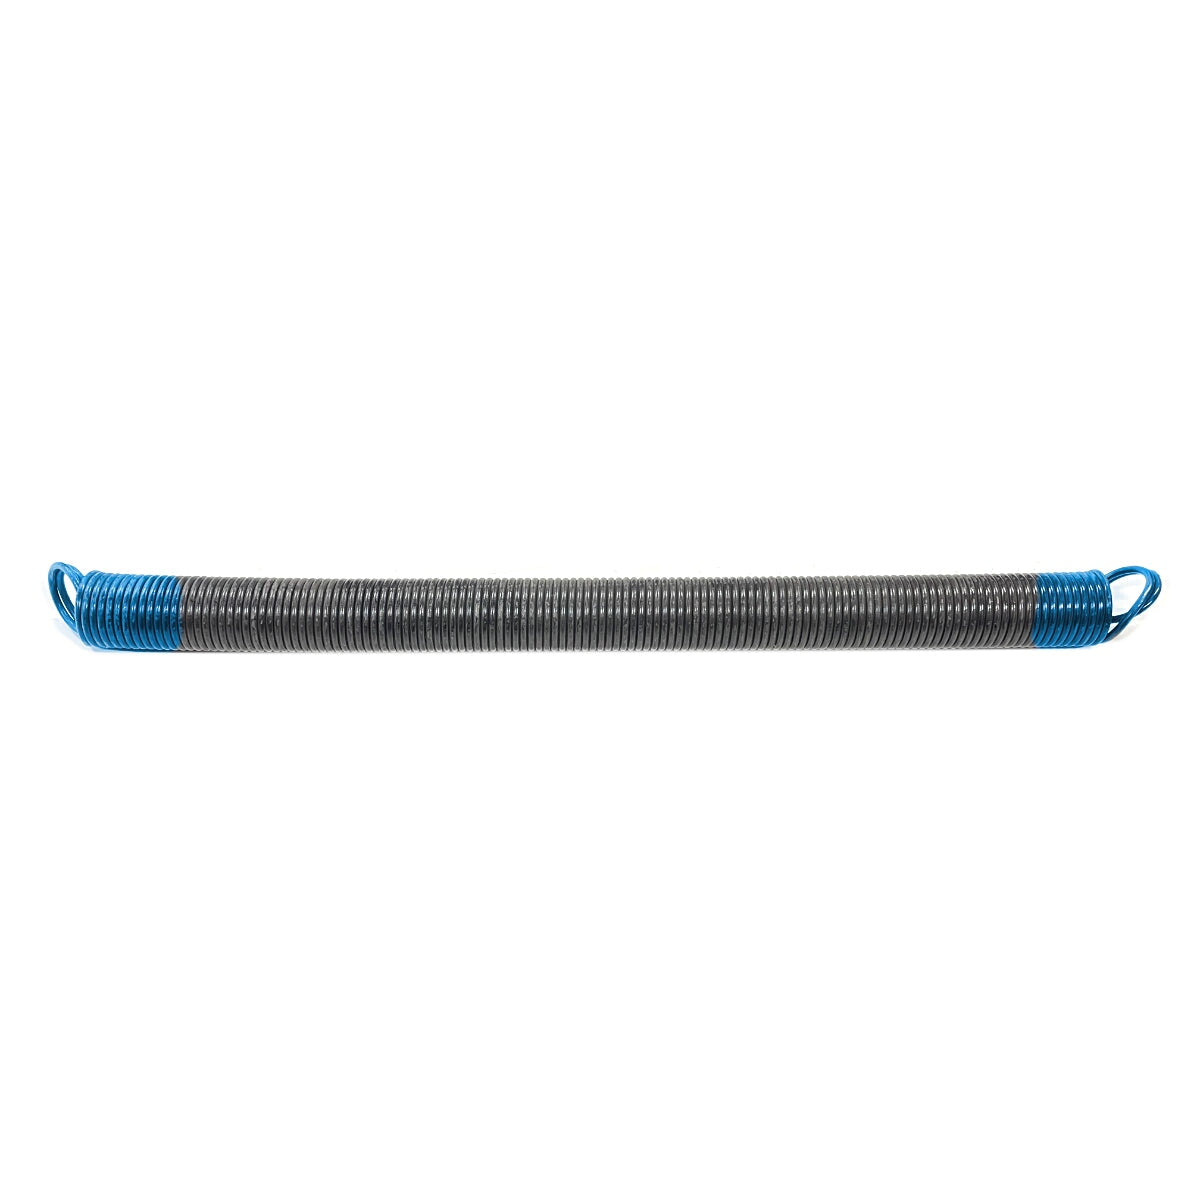
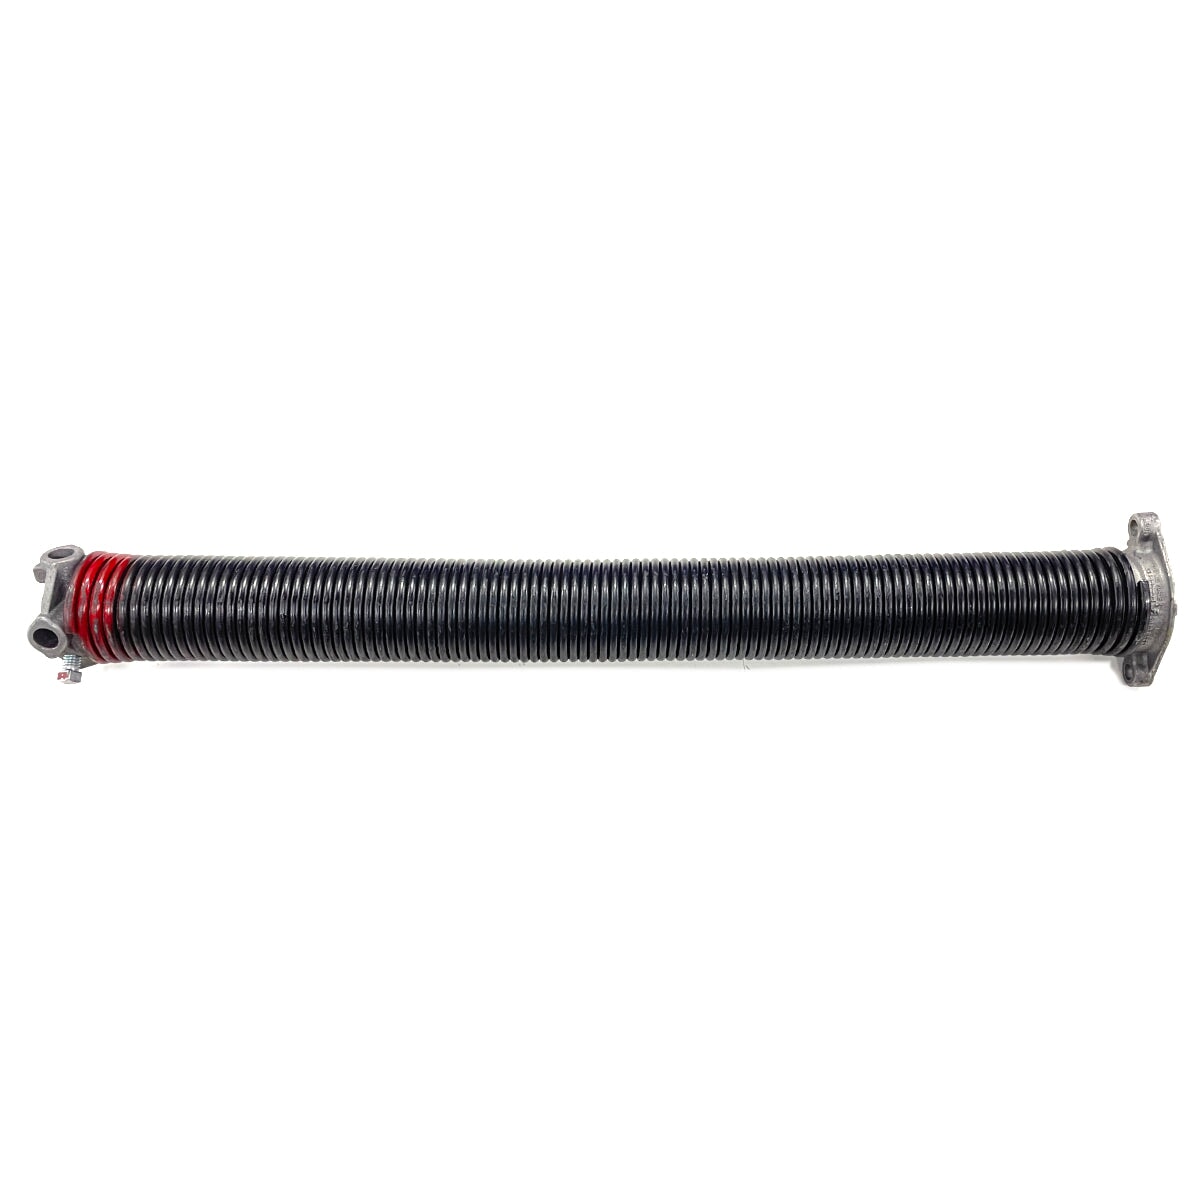
Springs


Torque Master Spring Installation Made Easy: 6 Simple Steps


Installing Torque Master springs might seem intimidating at first, but with the right tools and step-by-step guidance, it's a manageable DIY project. This guide will walk you through the complete installation process from start to finish.
Before you begin, make sure you have all the necessary tools ready: Phillips screwdriver, locking pliers, needle-nose pliers, and a step ladder.
Step One: Insert New Springs
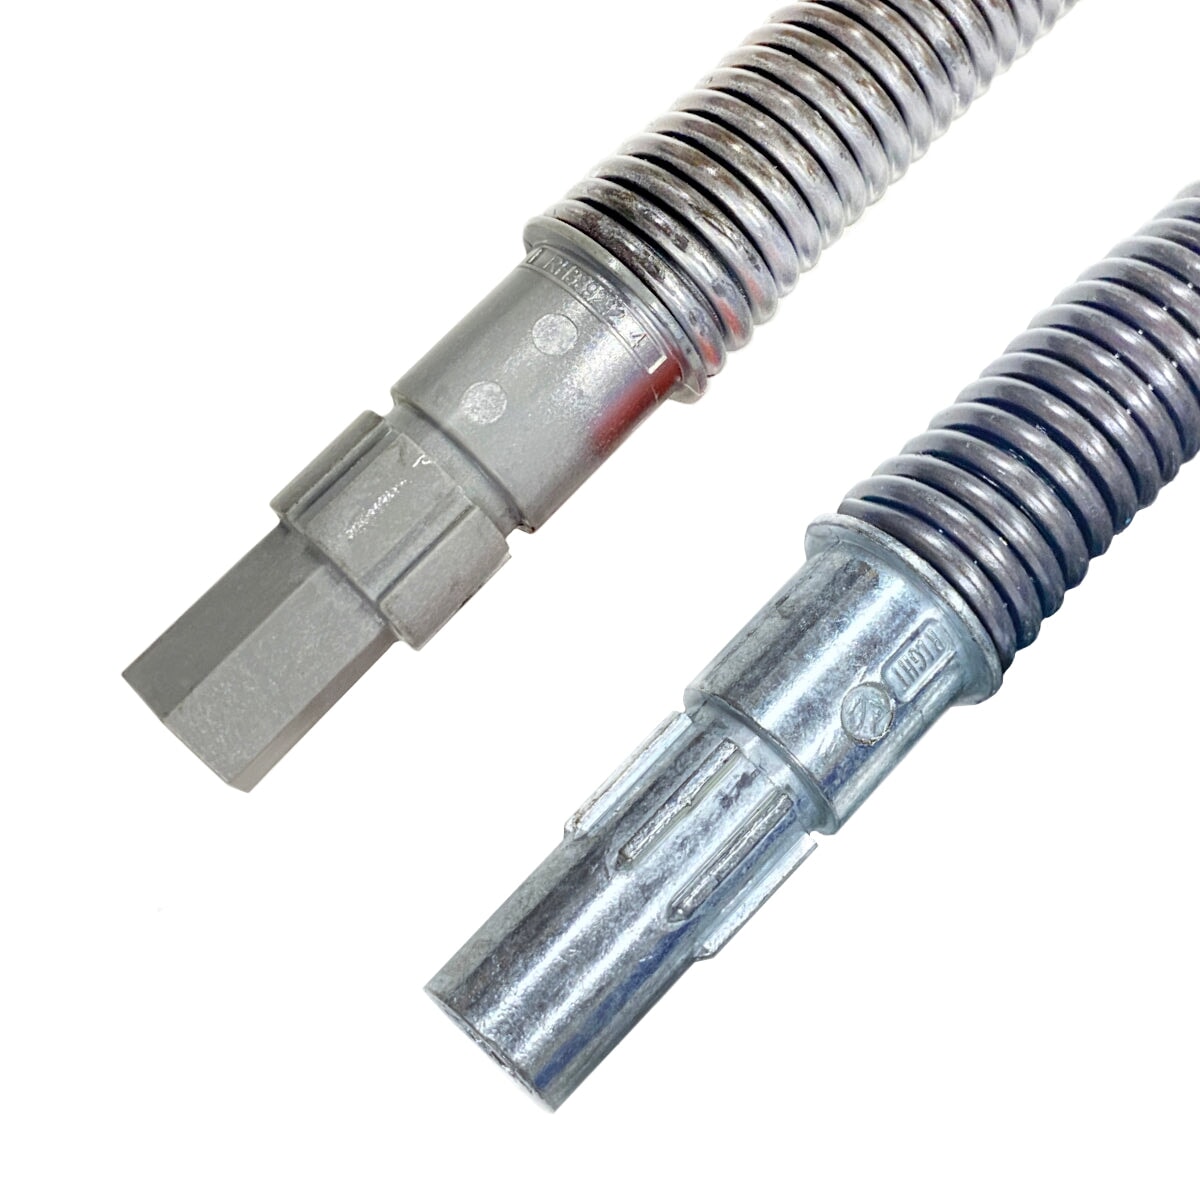
To start, slide your new right or left hand springs into the metal tube, perch end first. Then place the tube back on the center wall bracket and flag brackets above your door.
If you have a rear mount low headroom setup, install your drum wraps now. They're labeled left and right, so make sure the tabs face the correct direction. If you don't have drum wraps, skip this step and move on to step two.
Step Two: Install Cable Drums
Make sure the end of the spring hangs out of the tube about 5 inches on each side. Center the tube in the wall bracket and bend the center tab over the bushing on the right side. The teardrop peak on the tube should point straight up.
Slide the correct drum over the winding shaft until it's fully seated. Then wrap the cables one and a half turns or align with previous settings. For double springs, repeat on the left. For single springs, insert the idler bracket until it clicks twice and seats flush.
Step Three: Mount End Brackets
The right end bracket has a cable guide – that's how you'll tell them apart. If the ratchet wheel falls out, reinstall it with the teeth facing upward clockwise.
Slide the end bracket onto the winding shaft matching the splines. Make sure the tab is seated. Attach it to the flag angle using a carriage bolt, washer, and nut. Then secure it to the jam with a lag screw.
For double springs, repeat on the left. For single springs, make sure the left drum bearing is tight against the flag angle with no rubbing or gaps. Then fasten your idler bracket.
Step Four: Adjust Cables
Start on the right side. Rotate the drum until the set screw faces away from the header and make sure the spring tube peak is straight up. Loosen the set screw about half a turn.
Confirm the cable is seated in the first and second grooves. Pull it tight to remove any slack and make sure tension is equal on both sides. Tighten the set screw snug. Then add one and a half extra turns.
Trim the excess cable to about six inches and insert it into the drum. Repeat on the left side. If you're using drum wraps, slide and snap them into place until they click securely.
Step Five: Wind the Springs
Place vice clamps on both vertical tracks above the third roller to keep the door from rising. Use a ratchet with a 5/8 inch socket to wind the springs.
Start on the right side. Turn the paw knob up and rotate counterclockwise to add turns. Mark the shaft to count your turns. After two to three turns, stop and check cable tension on the left side.
Once both sides are even, finish winding both sides to the required number of turns for your door height listed in the manual. Then move the pole knob down to lock the ratchet.
Step Six: Balance the Door
Remove the vise clamps and lift the door halfway. If it rises by itself, remove turns. If it's heavy to lift, add turns. Always move the paw knob up before making adjustments.
A balanced door should stay in place when lifted halfway. That's how you'll know it's just right.
The Bottom Line
And that's it. Your Torque Master Plus springs are installed and balanced. Make sure everything's tight and cables are aligned before reconnecting your opener.
With proper installation, your new springs will provide years of reliable service. Remember to test your door balance regularly and address any issues promptly.
Got questions about your Torque Master spring installation? That's exactly the kind of stuff we love helping people figure out.
👉 Shop Torque Master springs and tools here: Browse Torque Master Products
FAQs
What tools do I need to install Torque Master springs?
You'll need a Phillips screwdriver, locking pliers, needle-nose pliers, step ladder, vice clamps, and a ratchet with 5/8 inch socket.
How do I know if I have a single or double spring system?
Check your current setup. Double spring systems have springs on both left and right sides, while single spring systems use one spring with an idler bracket on the opposite side.
How far should the spring hang out of the tube?
The end of the spring should hang out about 1 inch on each side when properly installed.
How do I know if my door is properly balanced?
Lift the door halfway and let go. A properly balanced door should stay in place. If it rises, remove turns. If it's heavy, add turns.
Can I install Torque Master springs myself?
Yes, with the right tools and careful attention to the step-by-step process, Torque Master springs are designed to be more DIY-friendly than traditional torsion springs.
Also in Garage Door Parts - DIY Handbook

How to Install a Garage Door Quieting Kit: Complete Guide
We've found that replacing the majority of the hinges and installing the rest of the kit does a pretty good job of silencing the door without needing to deal with that bottom roller. If you really feel it needs to be changed, we have a separate process for that, but it's not necessary for most installations.


Why Do Garage Doors Need Torsion Springs? Expert Explains
Think of your garage door springs like the counterweight in an old elevator. Without them, your door would be incredibly difficult to lift manually, and your garage door opener would burn out trying to handle all that weight on its own.